Call me Princess Cupcakerella

I am an elementary teacher but I am an artist at heart. I love to create using all sorts of media.....papier mache, plaster, clay, fabric, sewing, cakes, and furniture are just a few of my crafts. More importantly I am thrifty and green, which is just fancy talk for cheap!!! I love to use what I have, create something new from something old, or create my own media using cheaper ingredients. I enjoy watching children create art as much as I enjoy making it....I now hope you enjoy viewing it!

Friday, July 6, 2012

Marshmallow fondant

Recently I made a unicorn-themed cake for a dear friend. I wanted to use fondant on the whole thing but it was 3 layers and pretty huge. I decided to use store bought frosting, flavored with cotton candy, and this cool new stuff I found called marshmallow fondant....hmmm. Lo and behold it was super easy to make, tasted delicious, was easy to use, and stored well for a full month (after which I tossed it just because).
 First I picked some super flavors: pink lemonade and funfetti are always favorites! I also found this new stuff from Duncan Hines that flavors frosting....its cheap so I tried it. Really tasty! I got cotton candy.
I used pink lemonade for the big sheet cake and my little hearts. The rounds were made from the funfetti.
 Awww, aren't they cute.
 Flavor crystals. Kind of weird but super tasty.

MARSHMALLOW FONDANT:
Super easy. Take 2 handfuls of marshmallows and wet them just a bit. Micro until super fluffy. If adding color, do it now. Mix the color into the goo. Dump it out onto a big pile of confectioner sugar and knead until soft and pliable. About 2 minutes.
This is a picture of the goo before I started kneading. Very sticky so have plenty of powder sugar available.
My sweet baby girl kneading fondant.

My other little helper.....what technique!

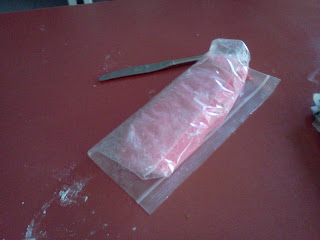
 Finished product. I made 4 colors. I rolled it out and cut shapes to add on top of the cotton candy frosting.
My bare cakes. I use a sheet cake and 2-9 inch rounds.

 I trimmed all the hearts (and the rounds) so they would be flat. Yummy extras for the employees (my kids).

 Flavor crystals in!
 I warmed the frosting to pouring consistency to make a smoother finish on my cake. Micro for 30 secs does the trick.
 Fondant shapes on!
Finished product. I have a My Little Pony unicorn for the top but she is MIA in this shot:)


Thursday, July 5, 2012

Sewing Retro Skirts!

I found a great pattern to make some simple A-line skirts that hang nicely on my waist and fall just below my knee....my EXACT specifications! They are super easy to make, having 2 panels in the front and 2 in the back. There are some options, too, for pockets, zippers, snaps, and hem lengths.
Back panel. Cut 2.

Front panel. Cut 2.


I love splashy fabric.....


Sorry...lighting sucks.
Owls and baking print. Owls have snaps and the blue skirt has a front zipper.

Snaps

Both have darts to fit in the front and back.

Front zipper.


DIY reface of an old porch swing

Hello everyone, my name is amy, and I am a cheapskate! 

But seriously, in this economy I cannot spend extra money on new furniture but I sure can rummage around my house and reface old furniture. About 7 years ago I bought a great porch swing from Meijer for the bargain price of $45! It is a sweet ride, too! It folds into a bed! I know....very cool. Anyway....this swing has taken a beating. Chicago weather is ultra harsh. This is what she looked like:


Rusted and beat to tatters! But who has a surplus of funky tablecloths? This girl! I first wanted to reconstruct the awning-esque covering that used to block the sun.  I had a great plastic tablecloth from Target that was on sale for $1.99. Initially, I was going to use my glue gun (a crafters BFF) until I realized the inside of the table cloth was cottony. I quickly decided to do some cutesy yarn stitches. For this I used my tie dyed yarn and a darning needle.


Here is the tablecloth. I used the "oblong" version.


I than laid it on the top frame, pinned it down, and stitched straight down.


Here is what the awning looked like:


Pretty cute, right? I next looked at the raunchy cushions.....BAM! More tablecloths! And one shower curtain:) I used one giant, awesome Ikea tablecloth I had that I think will be water resistant, and I used a hot pink shower curtain....also somewhat water resistant. I folded them over, right sides together, and sewed them like I would a pillow case (you know, just around 3 edges). I trimmed my edges after sewing....never cut until the last minute. Sadly, once I get into the zone I forget to keep taking pictures, so these pics are sparse:) Here are scraps on the cushion covers:

Fruity green

Hot pink


I also trimmed my old yucky cushions to the exact size....there is the extra, and like a true cheap skate I will save it for future use.
And yes, that is my sewing table....lol
I slid the cushions into the giant "pillow cases" and voila...instant garden brightness!


I will post pics of the complete swing soon....